Follow this guide if you have a Zigbee2MQTT network running and want to migrate to SkyConnect and ZHA.
Note: this procedure only helps migrate basic network settings to your Home Assistant SkyConnect, customizations like device names will be lost and automations will need to be updated. Most powered devices like lightbulbs will be re-discovered over time (you can speed this up by rebooting the device) but your battery-powered devices may need to be re-joined to the network for the migration to complete. There is currently no migration path to migrate all settings and devices.
If you no longer have the old stick, you can migrate via z2m backup.
Migrating a Zigbee2MQTT network to SkyConnect via ZHA
Step 1
Stop the Zigbee2MQTT add-on
- Under Settings > Add-ons, in the Zigbee2MQTT add-on, select Stop.
- Zigbee2MQTT uses the MQTT discovery feature to make the Zigbee devices available in Home Assistant. After removing the Zigbee2MQTT add-on, the devices are still present in Home Assistant since the MQTT broker is still holding on to the MQTT discovery messages.
- It is recommended to remove these stale devices from the MQTT broker (see next steps).
Step 2
Remove Zigbee2MQTT devices (option 1)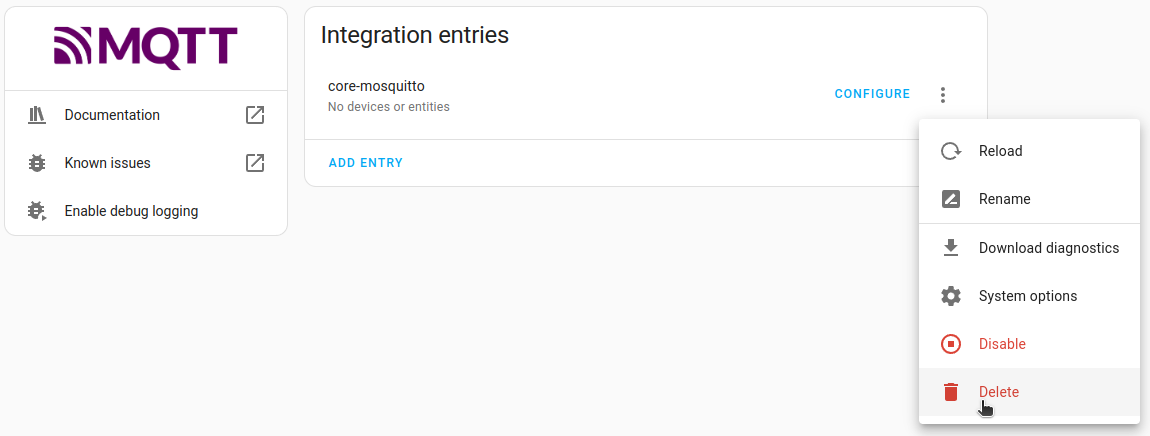
- If you don't use MQTT outside of z2m, you can delete the Mosquito Broker integration.
- Under Settings > Devices & Services, select the Mosquitto broker integration.
- Select the three dots and in the dropdown menu, select Delete.
Step 3
Remove Zigbee2MQTT devices (option 2)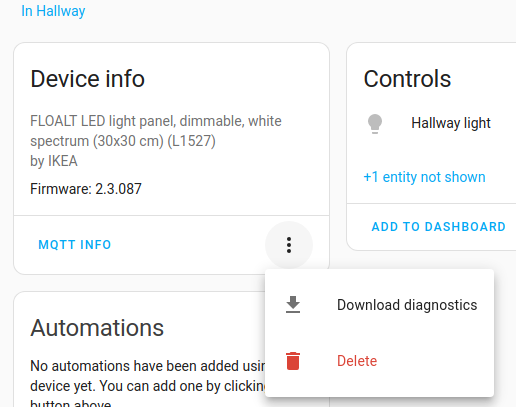
- If you don't want to delete the Mosquito Broker integration, you can remove the devices from the MQTT network.
- In the integration card, select Devices, under Device info, select Delete.
- Repeat this for every device.
Step 4
Add ZHA integration (1)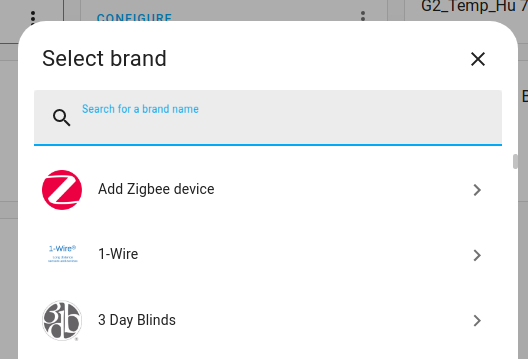
- Under Settings > Devices & Services, if you do not see the ZHA integration, select the Add integration button.
- From the dropdown list, select Add Zigbee device.
Step 5
Add ZHA integration (2)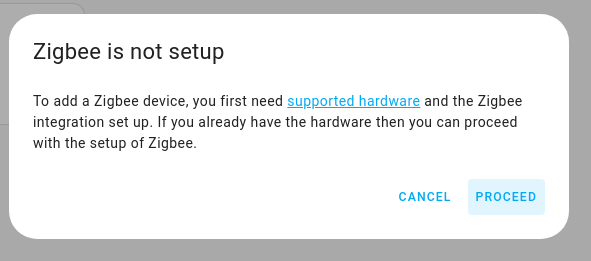
- Make sure your old radio stick is still plugged in.
- Select Proceed.
Step 6
Add ZHA integration (3)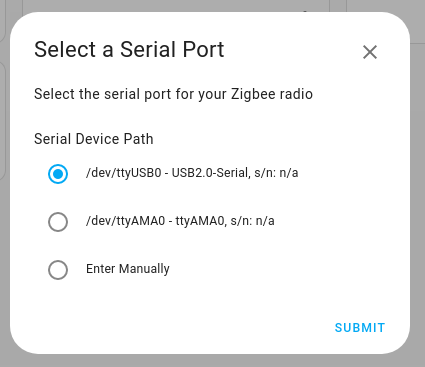
- Choose the serial device path of your old radio stick.
- Select Submit.
Step 7
Choose the network settings for your radio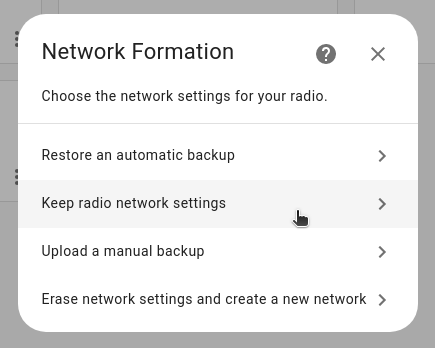
- Select Keep radio network settings.
- You can now start migrating the ZHA network as described below.
Migrate ZHA network
Step 1
Start radio migration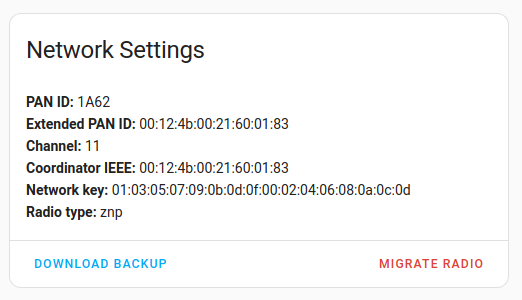
- Under Settings > Devices & Services, select the ZHA integration, then select Configure.
- Under Network settings add-on, select Migrate Radio.
Step 2
Reconfigure ZHA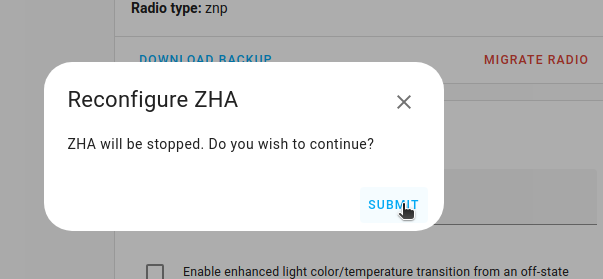
- Select Submit.
Step 3
Migrate to a new radio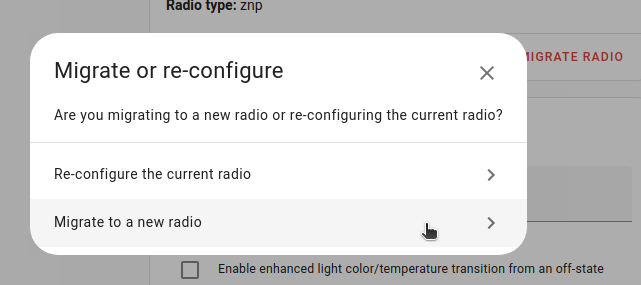
- Select Migrate to a new radio.
Step 4
Start automatic backup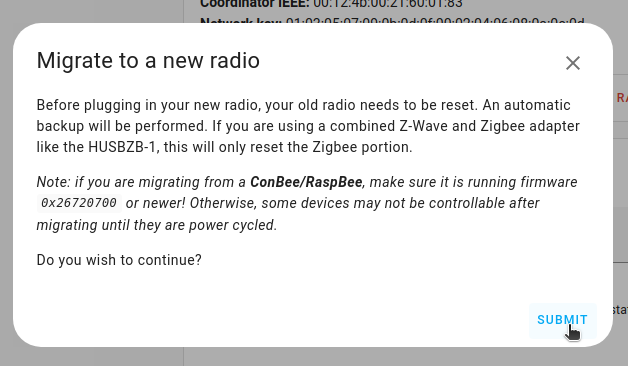
- Select Submit.
Step 5
Unplug your old radio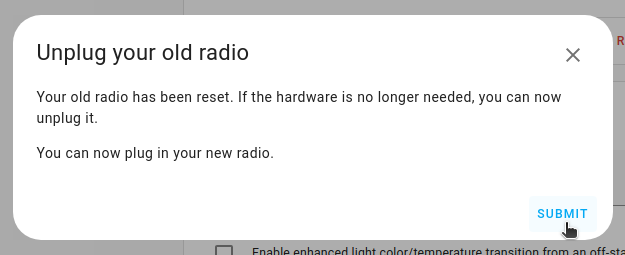
- If you no longer need the old radio stick, you can now remove it.
- Before selecting Submit, connect SkyConnect, as described in the 2 following steps.
Step 6
Plug the extension cable into SkyConnect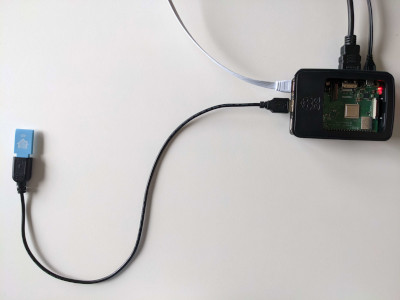
- Plug the Home Assistant SkyConnect into the USB extension cable.
- Plug the extension cable into your Home Assistant instance.
- If you are using the standalone Home Assistant Container installation method, make sure SkyConnect is mapped to the container.
- USB 3.0 ports and USB 3.0 drives can cause interference with 2.4 GHz protocols, including the ones provided by Home Assistant SkyConnect. It is important to use the USB extension cable and to position the Home Assistant SkyConnect away from possible interference sources. This video shows the effect of interference.
Step 7
Confirm that SkyConnect is plugged in- Now that SkyConnect is plugged in, select Submit.
Step 8
Choose the serial port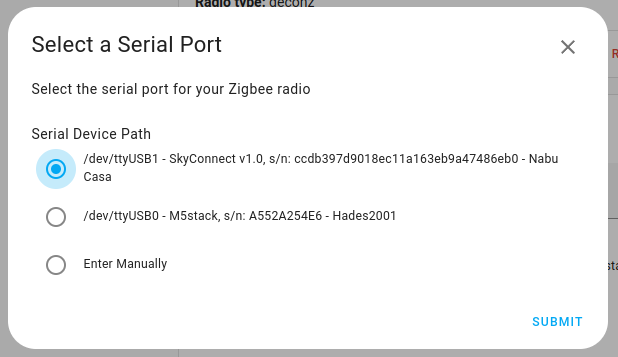
- Choose the serial port with SkyConnect and select Submit.
Step 9
Start the backup restore process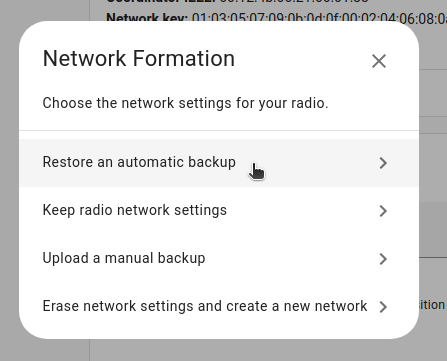
- Select Restore an automatic backup.
Step 10
Select the backup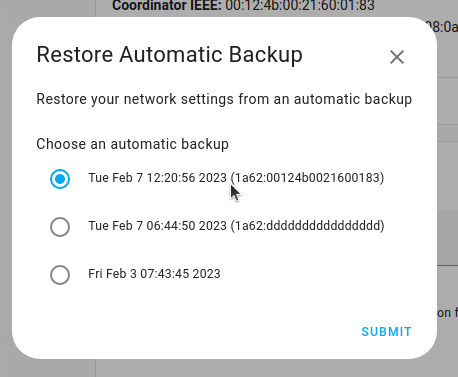
- Choose the latest backup and select Submit.
Step 11
Overwrite radio IEEE address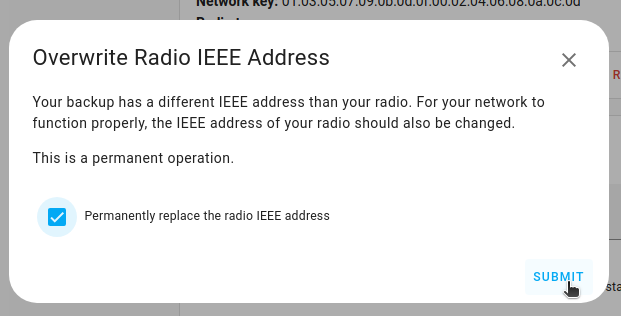
- Select the Permanently replace the radio IEEE address and select Submit.
- This means that your old stick and your new stick will have the same IEEE address. This is required for the migration process to complete successfully. From this point on-wards you should not operate the old stick in the same area. If you do not migrate the IEEE address from your old stick, you'll have to repair many of your devices in order to keep them working.
Step 12
Wait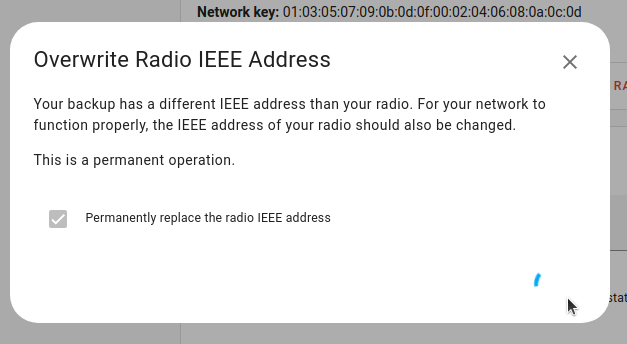
- Overwriting the IEEE address may take a while. Wait.
Step 13
Migration complete!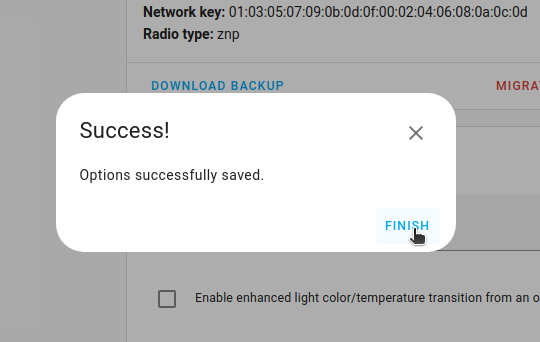
- Select Finish to confirm. The migration process is now complete.
- You won't be able to control the devices until they rejoin the network. Normally, they rejoin within one hour. You may be able to accelerate that process by power-cycling devices.